The unanimous Declaration of the thirteen United States of America or simply the “United States Declaration of Independence” was handwritten in calligraphy. The original signed calligraphic copy is displayed at the National Archives in Washington DC.
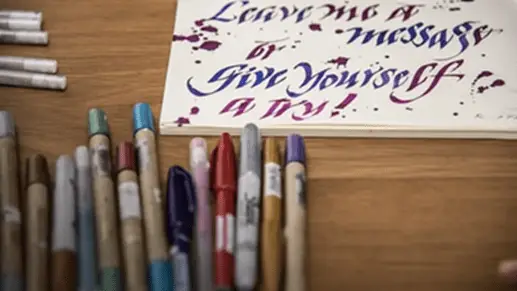
Writing with artistic strokes using a broad tipped tool, feather, or brush was popular in many languages. The advent of printing and writing machines was slowly rendering this into a lost art. Calligraphy is making a comeback. The skill is defined today as, ‘the art of providing shape to alphabet and signs in a harmonious, skillful, and expressive fashion.’
Calligraphy Pens
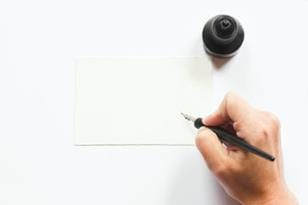
A good fountain can produce great calligraphy is used by talented persons. Professional calligraphers use various types of styluses, nibs, and instruments to give life to their works of art. An array of pens is available for beginners as well as experts in the field. Calligraphy is used in the below literature:
i. Invitations to events and weddings.
ii. Religious art.
iii. Computer fonts design.
iv. Graphic design.
v. Inscriptions.
vi. Certificates.
vii. Memorial documents.
Any calligraphy writer should know how to hold a calligraphy pen to create beautiful letters.
The First Step in Calligraphy- Holding Your Instrument
Holding the pen properly has a lot of effects on the writing that you create. It is very easy to understand that you did not hold the pen correctly by looking at the letters. You can even face a problem with the nib skidding on the paper. Uneven strokes are a basic characteristic of the art. They are accomplished by the proper style of holding your writing instrument by learning how to hold a calligraphy pen.
Are There Different Ways to Hold Different Writing Tools?
We are going to deal with the basic writing tools that are employed in modern calligraphy. They are:
i. Brush.
ii. Dip pen.
iii. Felt tip pen.
iv. Fountain pen.
The learner of calligraphy should know how to hold a calligraphy pen to use any of these tools.
How To Hold a Brush To Create Calligraphy?
A common brush pen can have a thickness of 6 mm to 20 mm. The head is usually made of sable or nylon. The stiff and short bristles of the head provide good control over the writing. A brush pen doesn’t hold ink, so it should be dipped frequently in ink.
The technique of holding a brush pen comes with practice. The thickness of lines produced by a brush pen is proportional to the pressure that the writer applies. You should be skilled enough to recognize as the pen starts to run out of ink. The lines will get scratchy as the ink gets exhausted. Then you will need to dip into the ink bottle to replenish.
Everybody has a unique way of holding a writing instrument. You may grip the brush pen in the same way as holding a pen while writing normally. As you advance in your calligraphy practice, you will learn to roll it between your fingers to adjust the tone of your strokes.
Holding a Dip Pen To Create Calligraphy
A dip pen has three major parts
i. The shaft, handle, or the nib holder: The user writes by gripping the dip pen on the shaft.
ii. The reservoir: This is a small depression situated above or beneath the nib depending on the design of the pen. It can hold some ink to prevent constant dipping into the ink bottle.
iii. The nib: This is a metal part that comes into contact with the paper or object on which you write. The ink comes out through the slit at the bottom of the nib.
A student of calligraphy advances to dip pens after learning the basics. Many beginners get used to this tool with practice and hard work. You can hold it the same way as you usually hold a normal pen. The only difference is the pressure applied on to the nib, that has to be learned from practice.
The Best Way To Hold A Felt Tip Pen To Make Calligraphy
A dip pen has three major parts
i. The shaft, handle, or the nib holder: The user writes by gripping the dip pen on the shaft.
ii. The reservoir: This is a small depression situated above or beneath the nib depending on the design of the pen. It can hold some ink to prevent constant dipping into the ink bottle.
iii. The nib: This is a metal part that comes into contact with the paper or object on which you write. The ink comes out through the slit at the bottom of the nib.
A student of calligraphy advances to dip pens after learning the basics. Many beginners get used to this tool with practice and hard work. You can hold it the same way as you usually hold a normal pen. The only difference is the quantum of pressure to be applied on to the nib. That needs to be earned through practice.
A great advantage of these types of pens is that they come with cartridges that do not require constant refilling like other instruments employed in calligraphy. They are cheap compared to the costs of other calligraphy pens. These pens are very easy to use and are best recommended for beginners.
They have two notable disadvantages:
i. The ink can douse the paper and spoil your work.
ii. You will run out of ink quickly.
These minor disadvantages are fine since you will be advancing to other instruments after beginning with a dip pen. This is a common answer to how to hold a calligraphy pen for beginners.
How To Hold a Fountain Pen To Write Calligraphy?
Fountain pens were the only writing instruments available at a time to write even normal letters using ink. Advanced calligraphers used to change the nibs on these pens to add more professionalism to their content. All beginners can progress on to use fountain pens after getting to have a good hang of the art. A great advantage of these types of writing instruments is that the writer doesn’t have to dip frequently into the inkpot. Fountain pens have a compartment above the nib apparatus to hold ink. Advanced models can have changeable cartridges that can hold different colors of inks.
The ink freely flows into the nib which has a tiny slit. The ink comes out of the pen through this slit onto the surface on which the inscriptions will be made. Holding a fountain pen doesn’t require much practice. It can be held much like any other pen used for writing to create fantastic calligraphy.
How To Hold a Calligraphy Pen For Different Writing Styles
i. Downward stroke: The nib needs to remain flat on the surface of the paper to make a rudimentary downward stroke. This is achieved by maintaining a nib angle of zero degrees with the paper. Throughout the exercise, the pen will be horizontal with respect to the top line of the words in that row. To get the best results, sustain a uniform pressure till you complete the stroke.
ii. Upward stroke: The writer has to hold the pen at an angle of 45 degrees away towards the top of the page. This needs some practice. Beginners should try to draw even upward strokes from the bottom of the paper to the top. You can self-verify the quality of each stroke and compare it with the previous stroke. The thickness of the lines depends on the amount of pressure applied. Applying more pressure will create thicker strokes. Similarly, less pressure will result in thin strokes.
iii. Sawtooth pattern: The zigzagged strokes are very essential to create italics. A common trick used by trainers is to write the word ‘minimum’ many times to learn the pressure and directions to create Sawtooth patterns. Writing this pattern is helpful for beginners to learn positioning the writing tool at the correct angle for different types of strokes. The angle to be maintained with the paper is 45 degrees.
Usually, the upstrokes in a Sawtooth pattern are thin and down strokes thick. The writer will also learn how frequently to lift the pen from the writing surface.
iv. Placing of the wrist: When we write on a piece of paper with a normal pen, the base of the palm rests on the writing surface. In calligraphy sometimes the wrist needs to be above the paper without touching anything. Sometimes, a piece of paper is placed beneath the wrist so that it doesn’t soil the writing paper.
It takes a bit of practice to know when to lift your wrist and when to place it on the paper. Whatever is the case, an important factor is the ease of maneuverability of the pen between your fingers when learning how to hold a calligraphy pen.
The Most Comfortable Grip To Hold Your Pen
We can find a lot of similarities in the different people hold their pens. Almost everybody holds it between the thumb, index finger, and middle finger. You will be able to discover on your own as you advance, the best grip that suits your style. Useful advice is that instead of changing the angle in which you hold the pen, use different directions of movement with your hand. This is achieved by controlling the wrist movements.
Be very conscious of the way you hold the pen as you practice the alphabet many times. A comfortable grip will come to you automatically when you work hard to learn how to hold a calligraphy pen. A handwritten note has a personal touch from the point of view of the receiver. The handwriting on the note is a piece of the personality of the writer. Use these tips to hold your calligraphy pen correct to create awesome inscriptions.