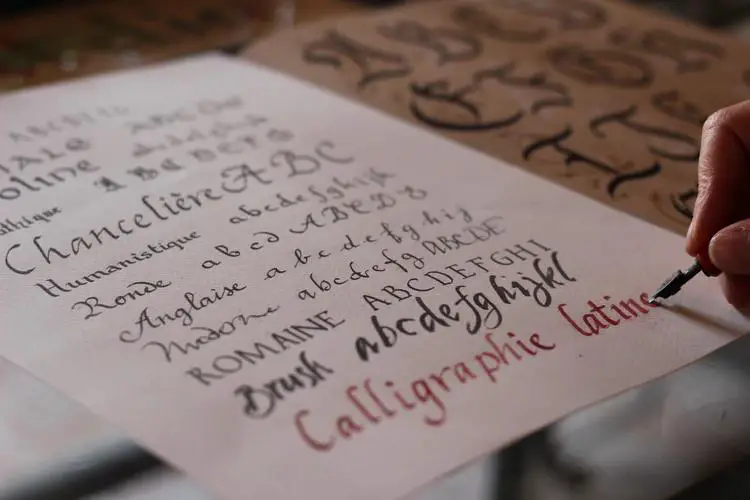
Calligraphy is the art of writing which appeals to the visual and aesthetic senses. It is a form design writing which was used for many historical manuscripts as well. It is used today for designing products. Many people find calligraphy interesting and fun to learn, as it is a precise and beautiful form. It is a formal way of writing and has many new editions, but there are certain features which remain consistent in calligraphy.
It is used to show a creative and beautiful aesthetic of a particular language and its lettering. It has been used to showcase the appeal of the language and its script through the skill of calligraphers, who work diligently to create this expressive form.
There are various versions of calligraphy in today’s times. Writing with a regular pen or pencil, or even using chalk, are some common versions of calligraphy we can find.
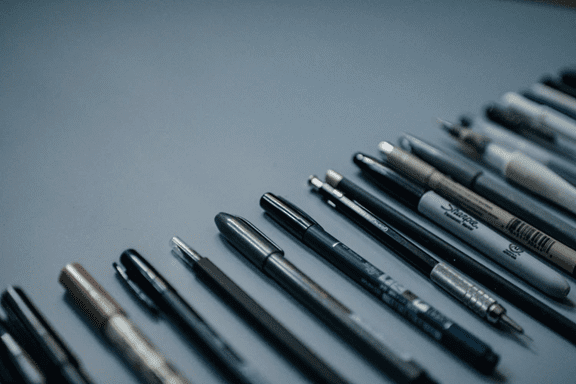
If you have watched any videos or read up on calligraphy, calligraphers often use a fine tipped pen for creating their work. The instrument, known as a calligraphy pen, looks like a fountain pen. However, if you are a beginner in calligraphy and want to practice or try this aesthetic handwriting form, you can use a regular pen for your individual practice. This is also known as ‘Faux Calligraphy’ or ‘Fake Calligraphy’ as it does not use the instruments designed specifically for calligraphy to create a penmanship.
If need be, you can start with a regular pencil as well, and eraser. However, most calligraphers prefer pen calligraphy.
So, how can you write calligraphy with your everyday pens? This article focuses on discussing a few tips for the same.
What are the materials required to start your own calligraphy practice?
For starters, you require a writing instrument. A standard pen, ball-point or gel pen will do. Find some sheets of paper for practice. Plain, non-ruled sheets of paper are preferable for perfecting the calligraphy practice. However, if you are a beginner, you can use calligraphy sheets and notebooks, or rules sheets. These will be useful for learning the basics of calligraphy writing. This is because we often develop our own way of writing.
There are specific formats of cursive writing which are part of calligraphy. As children, we usually write our alphabets in these handwriting notebooks and we follow the basic dotted letters. These notebooks will come in handy for those who write in specific, or a contrasting way and wish to alter it. You can use these to learn the basic cursive calligraphy writing. This can be an additional and basic part of your practice.
With these materials, you are now ready to start your calligraphy practice.
Finding the Calligraphy Font you wish to learn (Tip: Start with cursive!)
There are different techniques and types of calligraphy fonts. Calligraphy fonts will have a definite difference based on the language you wish to work with. Calligraphy in Chinese, Japanese, Sanskrit, Tamil are some examples where the writing differs as the scripts change as well.
However, even within a single language and script, there are varying fonts. Taking English as the example, we can find the cursive script, which is most commonly taught, or the modern script. Some calligraphers work with the traditional fonts which were used for writing in the past, while there are also typewriter calligraphy fonts. The aesthetic changes with each font. You can choose a font style you like and attempt to learn that.
Here, we will take the basic cursive handwriting, and the bold cursive formats of calligraphy, to see how we can write it with a regular pen.
Learning about the Basic strokes
Each curve and line we create while writing a word in calligraphy is called a stroke. These are the frequently seen loops and curves which are part of many letters. It is very important to know about while learning calligraphy.
Examples of a few basic strokes include the downward stroke and the upward stroke. The downward stroke refers to the lines where we begin at the top, and end at the bottom. Think of how you write the letter ‘L’. We commonly start from the top and reach the bottom to make the vertical line and then move our pens to the right.
The upward stroke, is exact opposite of the downward stroke. Here you start from below and move your pen upwards. Think of when you write the letter ‘t’ in the word ‘often’ while connecting the letters. Since we end at the bottom at the end of the ‘e’, we can move upwards to form the vertical line in ‘t’. This would be an example of an upward stroke.
The oval stroke is the stroke with which we form loops, such as in the letter ‘O’. This is usually created from the top, in an anti-clockwise motion. The clockwise motion would be the reverse oval.
There are many other types of strokes, like ascending, descending, under turn and over turn. You can look into these calligraphy strokes in much more detail as calligraphy is a very detailed art form. However, the downward and upward are the basic strokes, which we will be discussing in the methods below.
Different Methods of Calligraphy Writing with a Regular Pen
Here area few methods you can use to improve your calligraphy writing.
1) The Downward Stroke Method
This is a method which is part of the basic cursive calligraphy template. In this method, you first begin by writing a word. Make sure you are aware of the spacing between each letter, which should look equal. Connect the letters.
After this step, look at the places where you wish you to thicken the font. A simple tip is to look at the lines, or strokes as they are called, which are naturally downward. You wrote these.
For example, in the small letter ‘c’ the side curve area is downward. Find the spots you want to highlight or thicken compared to the rest of the parts. In these areas, make another line with you regular pen and fill the gap between the two. This creates the perfect bold cursive illusion part of basic calligraphy.
Usually, a fine tipped calligraphy instrument with ink will help create these bolder and thinner cuts. Here it is the skill of the calligrapher, who can press and lighten the hold on the pen to create the effect accordingly. However, with a regular pen or pencil, you can create this by following the above method.
2) The Double Line Method
In this method, which is similar to the Downward Stroke Method, you can write the word in cursive calligraphy, with the letters all connected. Next, you write it again, but this time, with a space between the first written word. In the connecting areas between the letters, which are at the bottom, join the new strokes with the earlier ones.
This will again, create the illusion of slightly thicker letters and thinner connecting ends at the bottom. Carefully fill the gap between the new and old strokes and you have created your calligraphy word!
3) The Two Pen Method
This is a method for those who wish to try a different, fun, creative process. It includes using two pens at the same time instead of a single pen. For this, you need two pens – the same company, same color and are the same type. Using a thin elastic rubber band, tie the pens together as tightly as possible.
You will have to hold the pens at an angle, so that the strokes are drawn separately. The preferred angle is forty-five degree. Depending on whether you are right-handed or left, to the right or the left respectively. Practice to check which angle connects both the lines and switching to the forty-five degree angle from that angle. Both of these will come in handy.
Now, you can try to write the word. At the ends and the bottoms, try to connect the lines of both the pens. If you are unsure, use a single pen for these strokes. Then, switch to the
forty-five degree angle for the middle portions of the letter where it would be thicker. Next, you can fill the space between the two lines made by the pens to create a bolder font. This works for larger sized fonts and for a vintage cursive font. It is for your personal fun and to help you create simply, efficiently and with a little extra fun sprinkled in the calligraphy writing.
Important Tips to Keep in Mind
- Practice helps. You may not be an immediate calligrapher. Do not lose hope, keep practicing until you feel comfortable and can write more easily.
- Use a ruler. Initially, while practicing on plain sheets, we tend to naturally slant our writing. Use a ruler to make sure the letters are straight, of the same size and equally spaced. Over time, practice without a ruler. Over time, you can develop the skill of forming straight, equally spaced and correctly sized lettering.
- Choose a good pen. Try out different pens and start with easier pens. Easier can be different for each person, and refers to structure, grip and ink. Use a ballpoint pen for the maximum precision. However, professional calligraphers tend to use ink, and ink pens can be used once you learn faux calligraphy with a regular gel or ballpoint pen. This will help you move to the next level.
- Learn and have fun! Do not be afraid to learn more about calligraphy. Try new fonts. Read about its intriguing history in different parts of the world, if you find it interesting. But most importantly, have fun while learning and creating.
Practicing and enjoying the process will help improve your skill. Happy calligraphy writing!