
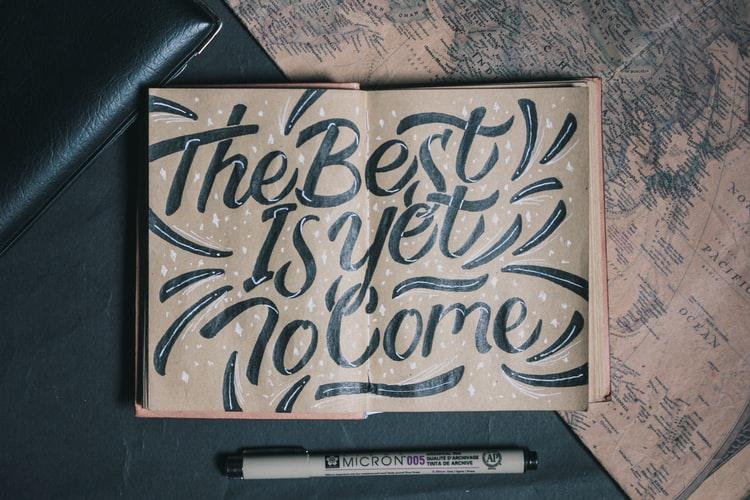
Calligraphy
A visual art form that uses written letters as its content is known as calligraphy. In its most basic definition, it is the art of writing beautifully. In Asia and the Middle East, calligraphy is thought of as a significant kind of art. Ancient reed pens were used to write Arabic script. This was one of the first folded calligraphy pens made from straight reeds. Nibs were fashioned into different points, depending on the pointedness and sharpness required for letters. In 16th century Europe writing with a calligraphy pen was distinguished from writing with a regular pen. The quill was used to write calligraphic script in Europe and the Americas.
A folded pen, used in calligraphy, is simply a pen that has a nib made of a piece of folded metal. As the nib is curved to one side, the fold acts as a reservoir of ink. The aim of a folded pen is to achieve extremely precise strokes and lines, both sharp and straight, and ultra thick and very thin. The beauty of the folded calligraphy pen is that it can be made in various sizes. Due to this, it has the ability to create a wide range of strokes. Although a lot of people are exploring the adventurous world of digital art these days, there is a great deal of satisfaction in creating your own handwritten font. This can only be achieved with calligraphy.
It is possible to produce dramatic and extraordinary writing effects with the folded pen. You can adjust your angle one way or another and even use it in art work for different results. The folded pen was first introduced to the world of calligraphy at the conference of the Letterforum in 1995. Matthew Coffin invented it. It’s not hard to make one yourself. Expand your world of knowledge if you are a calligraphy enthusiast. Even if you aren’t, you can learn something of value by learning how to make a DIY folded pen. Just read on.
An insight into ruling pens and folded pens
When you want to create your own lettering, ruling pens and folded pens are your tools. What are these, though? Ruling pens, in olden times, were pens used to draw straight lines. The nib of a ruling pen is made of two pieces of metal. This looks a bit like a jaw, held in place by means of a screw. If you tighten the screw, you can constrict the jaw opening. The flow of ink will be controlled and you can produce thin lines, as a result. Contrastingly, on loosening the screw, you can create thick lines. Ruling pen brands that you can buy are the Folded Ruling Pen and the N22 Ruling Pen.
The folded pen, as mentioned earlier, has a metal nib, which is pretty straightforward. The nib may be shaped differently in various pens to get desired results. Calligraphers, since long ago, figured out that these pens could be used, not just for draftsmanship and drawing, but also for writing and creating excellent script fonts. The tradition has been passed down the ages. Vertically dragging the nib, moving down a page, produces an ungainly texture and splattering. Horizontal movement is the way to go.
DIY folded pen materials
Many calligraphers work on tight budgets and cannot afford fancy tools for writing. There are a range of these on the market, but quite costly. Besides this, you may want to explore and experiment first. The calligraphy world may be new to you. Before you make a heavy investment, it’s always good to be sure it will yield fruitful growth. With this lesson, it’s easy to make a cost-efficient tool of your own. You will need:
- A marker
- A knife or a pair of scissors
- Tape
- An aluminum can
- Ink
- Paper
- A pencil or popsicle stick to use as a handle
Starting to make the pen
You can drink up a favorite can of any cola and get ready to use the empty can. The folded pen nib will be made of this. The first thing to do is mark some lines around the top circumference and base circumference of the can. Down the body of the can, mark a line. From this side, your can will look like it has a “T” on it. With a knife or a pair of scissors, cut along the length of the lines. After cutting, you should have a rectangular piece of metal. Make the sheet as flat as you possibly can. Take great care while you do this. Edges can be sharp and jagged.
Making the nib
Lay the pencil or popsicle stick, or whatever you’re using for the folded pen handle, on the flattened metal sheet. Rest it so about the top 1 to 2 inches is on the sheet. With your marker, mark out a block looking shape with a neck. The neck portion will be wrapped around the handle. Make sure the size is proportional to the handle you’re using. Don’t make it too thin or the nib’s head will snap off the handle. At the same time, don’t make it too wide or it won’t wrap around the handle properly.
Cut out the block-with-the-neck shape. Fold the cut piece of metal in half over the handle. You will see half the metal (as a square) on one side of the handle, and half on the other. From the upper corner of the metal square that is folded over your handle, mark a curve to the diagonal lower corner. On the other folded side, do the same so that the curved lines are aligned. Make the curve a bit flatter at the top. This permits a contrast when you actually write with your folded pen. With a pair of scissors, cut the folded metal piece along the curved line that you marked.
You can secure the neck in position by wrapping sticky tape around it and the handle many times. See that it is firmly affixed to the handle. You can’t have parts of the pen moving even slightly while you are engaged in calligraphy. Your nib’s curved edges should sit side by side, touching. As a result, this acts as a reservoir for ink collection when you dip your pen into ink.
Finishing touches
See that you do not stick the curved edges shut. You need the edges to be separated as the ink must flow through while you’re writing. Also, see that the edges aren’t too far apart. If this is the case, the ink will totally spill through the gap. With your fingers, press the edges together if they’re too wide apart.
Using your folded pen
How you hold your folded pen is the key to using it correctly. As it is quite a delicate tool, the pen needs more support. It has to be stable while you write. Your movements may be heavier handed and you must take care not to put too much stress on it. As you take the pen in your hand, see that the neck of the nib is nestled between your forefinger and your thumb. Let the rest of your fingers go around the folded pen’s handle.
Take care not to put much pressure on the nib or close to it – it may bend and become shapeless! The best way is to practice holding it without ink first. Be light with your touch till you get the feel of your nib’s strength. The way you must hold a calligraphy pen is the same way you’d hold a knife while paring. Your inkwell is ideal if it’s walled and small enough to match the height of your nib. This will help to evenly fill ink into your pen.
After you dip your folded pen into the ink, position the pen horizontally. Tilt it close to the page and write by dragging downward on the paper. This will produce a thick stroke. For a thin stroke, tilt the nib in such a way that only the nib makes contact with the paper. Here, you have to move upwards. Brush pens are used in much the same way. Practice will make you perfect.
Things to remember
- Angles at which you hold the pen will reflect what you create. When the nib is held closer to the paper, strokes turn out smooth and fine. If you want a gritty look with splatter, a rough script, you must tilt the nib away from the paper. Hold it in an upright position while you write. Place a newspaper below your writing paper, and wear old clothes, as the ink will travel to many places!
- Movements and speed directly impact the strokes you create. If you move with a slow and steady stance, your work will look stable. Fast motion gives writing a more inconsistent look. Letters appear to be loosely formed. This may work if you’re aiming for something casual.
- Smooth paper is great if you want a refined look. Rougher paper is good for a gritty appearance with some splatter.
- Make sure you use good quality ink. Ink that is waterproof, holds itself in shape, and dries fast is ideal.
- You can make nibs of varying sizes and shapes as you will have aluminum left over. Experiment with what works for you.